Concrete Services

Choosing the Right Boat Lift

Boat Lifts For Sale Near Me helps keep water vessels out of the water, preventing extensive deterioration. It also helps reduce costly repairs and saves upkeep time.

The type of lift you choose depends on where you live and how often you use your boat. Rough locations require a heavy-duty lift, so look for one with thicker arms, mechanisms, and bolts.

Several factors need to be considered when deciding which boat lift is right for you. You should consider where you will store your boat, what type of weather it is likely to receive, and the overall weight of your vessel. Choosing the right lift will protect your investment and help you keep it safe from avoidable damage.

A conventional four-post lift is a great choice for many situations. It is a durable, economical option for commercial and recreational use. It is also easy to maintain and is suitable for various vehicle types. Depending on the application, you can choose various accessories to enhance your lift’s functionality. These include rear wheel slip plates, a single-point latch release system, and an alignment rack.

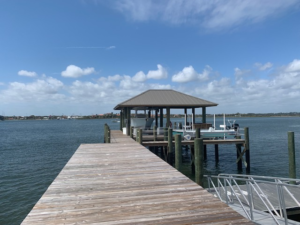
Another good option is a cantilever lift. This lift type is ideal for inland lakes and rivers with low currents. It has a simple setup and is easy to maintain. It can also be used when piers are not built due to limited waterfront space. However, this lift cannot stand up to strong winds and waves.

The last option is a hydraulic lift. This is the type of lift you’ll see on many homes on lakes and rivers. It’s a fast-lifting lift that requires less maintenance than other options. It’s best suited for medium-sized vessels, which can lift 60,000 pounds.

When choosing a boat lift, it’s important to consider your vessel’s location and your family’s needs. A boat lift can be a great investment for your boat, but you’ll need to ensure it’s designed and built to fit the hull of your vessel. Getting the right lift will help you avoid costly repairs and save time. It’s always a good idea to consult your local dealer for more information and recommendations. They can guide you through selecting a boat lift that’s perfect for you.

If you own a boat, you know the importance of protecting it from damage. A boat lift can help protect your vessel from the sun, wind, and rain and prevent it from becoming a theft target. In addition, it can eliminate the need to tether your boat to your dock with lines and bumpers, which can be a tripping hazard. Furthermore, a boat lift can prevent unnecessary corrosion and algae growth on your dock.

A floating lift uses air to support the weight of your watercraft. Unlike traditional dock lifts, which use hydraulic power, this lift is powered by air. A polymer tank is connected to the boat lift cradle, and air is pumped in or out depending on whether you want to raise or lower your boat.

These lifts are available in various sizes and capacities to accommodate different types of boats. They can also be customized for your unique water conditions and dock configuration. Some even have the option for solar power, making them a green choice for environmentally conscious boat owners.

Another benefit of a floating lift is that it is easy to install and remove, making it an ideal solution for seasonal boaters who need to keep the changing weather conditions in mind. Additionally, they can be installed in areas where piles cannot, which makes them an excellent option for beachfront property.

Before using a floating lift, ensure it can support your boat’s weight. Every lift has a recommended weight capacity; following these limits is important. If you exceed the lift’s capacity, you may damage it. Moreover, it is essential to use a lift that has a safety switch to ensure your safety.

Covering your boat with a canopy or tarp is a good way to protect it while on the lift. A canopy is a great way to protect your boat from precipitation, sunlight, and birds. It’s also a great way to discourage would-be thieves, who will find it much harder to steal your boat with a canopy covering it.

The boat lift is a great way to keep your boat out of the water and protect it from bad weather. It also makes it easier to use and maintain your vessel. Choosing the right lift for your boat depends on its usage, water environment, and other factors. You can choose between two types of lifts: Cantilever and Vertical. Both are designed for different purposes but have advantages and disadvantages.

Cantilever lifts are simple to set up and easy to maintain, but they don’t get your boat very high out of the water. Moreover, they need to be stronger to handle the leverage of the ship. They work well in inland lakes and rivers but can’t withstand strong winds or currents.

Alternatively, you can opt for a hydraulic lift. They are built with steel tubes and pistons that power the boat up and down on the lift. They don’t require pilings to anchor the lift, so they work well in many locations. However, they don’t have the same stability as other lifts, so you might need to add extra bracing to your dock if you use a hydraulic boat lift.

Consider a vertical lift if you’re looking for a more stable lift suited to rough conditions. These lifts are more expensive than cantilever lifts, but they provide more stability and support to your vessel. They also don’t require as much space and are better suited for fluctuating water depths and rough waters.

Another option is a floating lift, which uses a platform to hold the boat and is less prone to damage and algae growth. These lifts are usually used for boats with a lot of freeboard and can float in saltwater, making them more suitable for coastal areas. They are also easy to install and work well with existing docks.

Another advantage of a Floating lift is that it doesn’t require a pier, which can be costly. However, they are more sturdy than cantilevers and hydraulic lifts and may be prone to damage.

A vertical platform lift is a motorized device that elevates a wheelchair or scooter user to overcome barriers such as stairs. They can be installed in residential and commercial settings and come in open or enclosed models. Some are designed to be a cost-effective alternative to elevators inside a hoistway.

A typical vertical lift consists of a tower or drive mast, a platform, a landing gate or door, and a battery. Some also have a folding ramp to assist in getting on and off the lift. Depending on the model and installation, there may be additional safety features such as obstruction sensors, grab bars, call-send controls on the platform or COP (car operating panel), and a safety brake to stop the lift in an emergency.

When deciding on the best vertical lift type for you, working with a dealer who can help you understand all your options is important. This will ensure that you get the lift with all the features you need and that it is code-compliant. Some additional things to consider when buying a vertical lift include the space you have, the location where you plan to install it, and whether you prefer an open or closed system.

If you prefer a more modern look, choose an open vertical lift. These systems can be installed directly on the floor or in a pit (check your local codes – pit-mounted open vertical lifts are not permissible everywhere). They have two lifting heights and four different enter/exit configurations and are available in various platform sizes.

Closed vertical lifts are a great option for homes and some small businesses. They offer the same functionality as open models but are more aesthetically pleasing. They can be made in various materials to match your home’s decor and feature clear Plexi walls for visibility. They can be used indoors or outdoors and are ideal for patios, porches, and decks. An electric motor, a hydraulic ram, or a combination can power them.

Concrete Services

The Benefits of Concrete Lifting

If you have cracked and sinking concrete, the best solution is to pour a new slab. However, this can be expensive and only sometimes effective. For more information, just visit Concrete Lifting Cincinnati to proceed.

Fortunately, a much more affordable alternative is concrete lifting. This process involves injecting a foam designed to lift the existing concrete. The injections are made through holes less than an inch in diameter.

Whether you’re considering concrete lifting for your home or business, it’s important to understand the cost involved. The good news is that it’s much less expensive than pouring new concrete. Plus, it saves on demolition and removal costs. And it spares your lawn and flower beds from the destruction associated with concrete demolition and replacement.

Concrete lifting involves injecting a material underneath the concrete slab to raise it. The injected material may be mud, slurry, foam, or a combination. It is also possible to use soil in place of the injected material. The process is fast, which is a benefit compared to traditional remove-and-replace repair methods.

Concrete lifting can also help prevent future damage by addressing the root causes of the sinking. This is especially important for commercial properties, such as warehouses and retail stores, where people constantly walk on the concrete surface. If the ground is not properly compacted, it can erode over time, causing concrete to sink.

The best way to estimate the cost of a concrete lifting project is to contact a professional contractor. They will be able to provide you with a detailed estimate of the cost, as well as explain how the process works. They will also be able to identify any underlying issues causing the concrete to sink and recommend the best course of action.

Mudjacking is a popular method of concrete lifting. It involves drilling holes into the sunken concrete and pumping a mud-like substance, often a mixture of sand, limestone, and cement. The material is injected beneath the concrete, which lifts it and prevents further settling. Mudjacking is an affordable option and can be performed in hours.

Another alternative to mudjacking is polyurethane concrete lifting. It uses a similar technique as mudjacking but uses a lighter material and requires fewer injections. Polyurethane concrete lifting is more cost-effective than concrete replacement and can be completed in a few hours.

Concrete is a heavy material that can cause serious back injuries if it is carried incorrectly. Workers should use proper lifting and handling techniques, such as keeping their backs straight and knees bent when holding the concrete. They should also not twist their bodies while lifting the concrete and always have someone else push the load. In addition, they should wear personal protective equipment such as gloves and face protection rated for concrete work. If dust is present, workers should use a face mask or ventilator to avoid breathing it in.

Workers must also take precautions against chemical burns from wet concrete. Wet concrete is highly alkaline and can burn through clothing in a matter of hours. This is why wearing long sleeves and pants is important while working with concrete. Workers should also wear waterproof boots and safety glasses or goggles to protect their eyes from concrete splashes and dust.

Another risk associated with concrete lifting is exposure to crystalline silica dust, which can damage the lungs. This dust is created when mixing and pouring concrete and can become airborne. It can lead to immediate discomfort, such as wheezing and coughing; long-term exposure can even result in lung disease.

A final safety measure that every concrete lifting worker must take is to ensure that the concrete slab they’re lifting is secure. This can be done by providing that the ground underneath is sufficiently packed and that there are no structural issues or hazards. If there are, they should consult an expert to resolve them before lifting the concrete.

Concrete lifting is a great way to level uneven surfaces damaged by water erosion or other environmental factors. It’s an eco-friendly solution that’s also cost-effective and provides a guaranteed result. However, following all the safety measures mentioned above is crucial to prevent injury and accidents. These tips can also help improve productivity, maintain legal compliance, and decrease costs. By following these simple tips, contractors can ensure the safety of their workers and the success of their projects.

Discovering that concrete slabs within your home are sinking is frustrating, not only because of the negative impact on curb appeal but also because it can lead to tripping hazards, foundation issues, and more. But tearing up and replacing these slabs can be costly, messy, and disruptive to your home’s landscape. Fortunately, homeowners can now use concrete lifting, an innovative repair technique that takes much less time than traditional repouring.

This process involves injecting liquid into the sunken concrete, which becomes a rigid foam. This polyurethane foam is robust enough to support the concrete yet lightweight to reduce stress on unstable soils beneath your slabs. This helps to prevent future movement, making the lift sustainable and long-lasting. The injection holes required for this process are smaller than those used in traditional mudjacking or slab jacking, which helps minimize the repairs’ visual impact.

While this is a fairly quick repair method, the exact time depends on the size and condition of your concrete slabs. If your concrete is in good shape and has little settling, it may only require a few hours for contractors to complete the work. It could take longer if the concrete is in poor condition, with much void space underneath it.

Once the injection process is complete, your contractor will patch any access holes in the concrete. This is typically done with caulking, so the spots should be virtually undetectable afterward. Once the concrete has regained its original height, your contractor will test it to ensure it is safe.

Concrete lifting is a cost-effective and efficient solution for sunken concrete, particularly when the cause of the sinking is not obvious. If you have noticed that the sidewalks around your house are uneven or that your driveway panels are heaving, contact a concrete lifting specialist for a consultation. They can evaluate the condition of your concrete and recommend the best repair options. With the right professional, you can return to enjoying your home’s outdoor spaces in no time!

Concrete surfaces are used in various outdoor spaces, including driveways, sidewalks, and patios. They are strong and durable but can develop uneven or sunken sections over time, resulting in trip hazards. While it is possible to replace these areas with new slabs, this can be costly and time-consuming. Concrete lifting is a cost-effective and less disruptive alternative that can restore the safety and beauty of these spaces.

The process is also environmentally friendly, as it does not require the removal of the existing concrete and avoids landfill waste. The material injected into the recessed area comprises non-toxic, non-corrosive polyurethane foam. This material has high strength but is flexible enough to lift and level the sunken concrete.

Compared to the traditional method of laying new concrete, concrete lifting through slab jacking is much less invasive. New concrete installation requires large machinery that creeps on the property and disrupts nearby landscaping. Conversely, concrete lifting requires small equipment that pumps material into holes in the concrete. This results in less disruption and the process can be completed within a few hours rather than days for larger areas.

Another advantage of concrete lifting is that it does not require cement slurry. This liquid mixture is often messy and creates a mess that is difficult to clean up. Additionally, it has the potential to continue to settle over time, recreating the voids that caused the sinking. The foam used in concrete lifting, on the other hand, does not shrink or lose density over time.

While a new concrete slab can be beautiful, it can also look jarring when installed next to an older section. While it may be possible to match the color of a fresh concrete slab with that of the older one, it is unlikely that the new section will blend in seamlessly. Concrete lifting, however, can be completed quickly and inconspicuously, restoring the original appearance of your concrete surfaces. In addition, it is less likely to create a trip hazard and can be completed at a fraction of the cost of replacing the entire slab.

Concrete Services

The Basics of Driveway Paving

Paving Companies Charleston SC a driveway is a big job that requires heavy equipment. You should always hire a licensed contractor to complete the project. It would be best if you also surveyed the area for underground utility lines before beginning the work.

Permeable paver driveways are environmentally friendly and help prevent the waste of car fluids into sewer systems. However, they can get clogged easily and require regular maintenance.

The driveway paving cost can vary greatly depending on the materials used, site preparation costs, and local labor rates. The average homeowner can expect to spend about $2,500 to $6,600 on a new or repaved driveway. The time needed to complete the project depends on the material and the driveway size.

There are many different types of paving materials available for residential driveways, including asphalt, concrete, gravel, and pavers. Each type has its benefits and disadvantages. The best option for homeowners is to choose a paving material that will fit their style and budget. Homeowners should also consider the longevity of their driveway and how much traffic it will see.

If homeowners want their driveway to last long, they should choose concrete. This type of paving is one of the most durable options and can withstand the weight of heavy vehicles. It can also be colored and textured to add a unique appearance. However, it is typically more expensive than other types of paving materials.

Another popular option is asphalt, which is less expensive than concrete and can withstand the freeze-thaw cycle. However, it is prone to cracking over time and requires frequent resealing. Gravel is a cheaper option, but it can be prone to erosion and isn’t ideal for cold climates.

Concrete is an expensive option, but it is highly durable and can withstand the weight of heavy vehicles. Homeowners can decorate their driveway with various colors, patterns, and textures for a customized look. It is important to select a concrete driveway contractor with experience in the industry to ensure that the work is done correctly.

Local building regulations and drainage requirements also influence the cost of a driveway paving project. Homeowners should check with the city or county about the required permits and other fees. A permit typically costs between $50 and $200, but it may be waived if a paved driveway connects the house to a public street.

Permeable paver driveways allow water to pass through the surface, reducing storm runoff and the need for supplemental irrigation. This can help to lower landscaping and water bills. Nevertheless, these driveways require more maintenance than traditional paving materials since they must be regularly washed or vacuumed to remove sediment from the joints.

When planning a new driveway, it’s important to choose the right material. The type of material you choose will determine how long the driveway will last and how much traffic it can handle. There are many options available, from poured concrete to asphalt and pavers. Each option has its benefits and disadvantages. The best choice will depend on your needs and the climate. If you live in a cold region, choose a hard material that can withstand freezing temperatures. If you live in a warm region, consider an absorbent material that can absorb rainwater and reduce flooding issues.

The first step in installing a new driveway is to clear and grade the site. Then, a sub-base is laid. Then, the paving is placed on top of it. A special binder is added to the surface. This ensures that the surface is strong and durable. After the paving is done, it’s time for the finishing touches. The edges are then put in place using metal or plastic edging. This helps prevent the paving from moving or lifting.

Paving stone is one of the most popular materials for new driveways. It is the strongest material you can use on a driveway, and it can last for decades. It also has a beautiful look that can complement any home. The stones are available in various colors, sizes, and textures. You can even find patterned and stamped concrete pavers that add more character to your driveway.

A gravel driveway is a great alternative to a paved driveway. It is affordable and environmentally friendly. However, it can create dust and mud on your vehicle. It is also not suitable for areas with frequent rain or snowfall. In addition, gravel is less strong than a paved surface.

Another alternative to a paved driveway is a permeable paver system like TRUEGRID. These interlocking pavers are laid on a crushed rock base or other durable aggregate. Then, a layer of clean sand is added to help lock the pavers in place. This layer of sand is compacted and leveled with a motorized plate compactor or hand-held tamper.

Before you start installing your new paver driveway, you must first prepare the area for paving. This is done by removing any structures, trees, or other items that are in the way of your new project. Then, the area is graded and sloped properly so that water will drain away from your home. Then, the sub-base is laid. This can be sand or gravel and should be 4 inches deep. This layer will be the foundation of your new driveway, and it’s important to get it right!

Once the sub-base is in place, you can lay down the individual pavers. It’s a good idea to use a mallet to pound down the stones so that they stay in place and don’t move or shift over time. After the pavers are set, the joints between each stone are filled with joint sand or gravel to enhance stability further. This step is especially important if you choose a porous material like gravel for your pavers because it will need to absorb water from rain or sprinklers.

The final installation stage is to apply the top layer of fresh asphalt. This gives paved surfaces their jet-black appearance and provides a smooth ride. The top layer should also be graded and compacted for proper drainage.

If your new driveway connects to other paved areas, such as old roads or parking lots, you’ll need to install butt joints. These are the transitional areas where old and new asphalt meet, and they’re necessary to ensure a seamless transition that will not be jarring on your vehicle’s suspension.

While you can DIY this step if you have experience with heavy machinery, it’s best to leave it to the professionals. They can handle the heavy lifting and provide the professional quality results that you’re looking for. And if you’re worried about the cost, they can estimate your project based on the square footage of the installation site. That will give you a more accurate figure than simply calculating the price of the materials by themselves.

Paving a driveway is a big project that requires specialized skills and heavy equipment to install. It’s also a permanent improvement to your home, so you want it to last as long as possible and look great. The best way to do that is with routine maintenance.

Most paving materials need routine cleaning, scrubbing, and sealing to keep them looking good and working well. Different types of paving require other preventative maintenance solutions. For example, flagstone may need frequent scrubbing and may not be suitable for heavier vehicles. Concrete and asphalt need resealing every few years to prevent water from penetrating, freezing, and cracking them. Brick drives need regular weed removal and cleaning to keep them looking their best.

Sweeping asphalt is prone to developing cracks, so sweeping the surface with a stiff-bristled brush regularly helps extend its lifespan. Oil and gas spills must be cleaned immediately because they can soften the asphalt and cause further damage. Crack repairs: Asphalt pavement needs to be resealed with a high-quality, latex-based, or siloxane-based sealant every three to five years. It should also be repaired when a pothole appears because it can get larger quickly.

Weeds grow in the voids between the paving stones, and they need to be removed as quickly as possible to prevent them from becoming a problem. Generally, a paved drive is easier to maintain than an unpaved one.

Suppose you’re considering a paving upgrade to your property. In that case, it is best to leave this work to professional paving contractors with the skills and heavy equipment needed to do it correctly. They can also survey your site for utility lines, which is an important step before beginning any demolition or digging. Call 8-1-1 before you start a project like this to have the experts mark or flag any areas where there are existing underground lines that need to be avoided.

Concrete Services

Choosing the Right Material for Your Concrete Retaining Walls

Whether made from concrete blocks, brick, or poured concrete, Concrete Contractors Colorado Springs provides functional and aesthetic value to your landscape. However, it is important to understand all the factors involved before you start construction.

First, calculate how many blocks are needed for your retaining wall. This is a critical step that can help you save time and money.

concrete retaining walls

While retaining walls prevent undesired soil movement, they can also add beauty to the landscape. Many styles of concrete retaining walls are designed to mimic the look and feel of stone masonry. But if you want your new retaining wall to hold up to the elements, you’ll need to choose the right material.

One of the most common types of retaining walls is made from poured concrete, which can be molded into various modern designs and last up to 100 years. However, run concrete is extremely heavy and requires highly specialized skills to build. For this reason, it is typically left to professionals.

Another popular choice for retaining walls is block concrete. These specialized blocks are made specifically for building retaining walls and are designed to interlock to create strong and stable structures. Walls built with these blocks can be constructed by homeowners with average DIY skills and a strong back, but anything taller should be left to a professional. A professional will be up to speed on local building codes for retaining walls and have the engineering skills to ensure your retaining wall can withstand any load required to keep.

Concrete is a strong material that resists rot, fire, and rust, making it ideal for retaining walls subjected to various environmental factors, including moisture. It is also easy to work with, allowing contractors to add curves and angles to retaining walls that would be impossible or difficult to construct using other materials. Concrete retaining walls are also less prone to cracking than different types of retaining walls and can be built much more quickly and easily than traditional masonry structures.

While building a retaining wall, planning and including a drainage system in your design is important. Without a proper drainage system, water will accumulate behind the wall and put excessive pressure on it. This pressure can cause the wall to crack or buckle. Weep holes and drain pipes are usually included in the design to help alleviate this problem. Weep holes are lengths of 3/4-inch pipe inserted in the first course of the wall. This allows for water to escape through the gravel that covers them. A plastic drainpipe is placed in the backfill, directing water away from the wall and into the groundwater system.

If you have steep slopes on your property, retaining walls can help control erosion and limit the amount of dirt that shifts during rainfall. In addition, they are an attractive and practical way to add a garden area, patio, or seating area. These structures also help to prevent soil movement and protect against mudslides that can cause injuries on your property.

Many types of retaining wall systems are on the market, including poured concrete, segmental blocks, and precast modular units. Each has its benefits and drawbacks. Some are more expensive than others, but there are ways to cut costs, especially if you do the work yourself.

Poured concrete is the most common type of retaining wall. It’s easy to shape and is durable. However, it’s also costly: You can expect to spend $10 to $100 per square foot for installation and materials. A poured concrete wall can also be stamped or colored and accented with embedded objects to add an artistic element.

The construction of a poured wall is time-consuming and labor-intensive. You’ll need to dig the footings and create a foundation for the wall. You’ll also need to remove any vegetation or topsoil that may get in the way of building your retaining wall, a process called grubbing. This will allow you to lay out your wall and determine the best angle to construct it.

In contrast, a retaining wall built with a block system is less labor-intensive and requires less excavation. Unlike other retaining walls, block retaining walls don’t need to be reinforced with concrete. Instead, they use a layer of gravel or another material to provide a base for the structure.

Segmental blocks, available in various colors, textures, and sizes, are an inexpensive alternative to more expensive retaining wall systems. They require a layer of gravel to backfill, but they do not need a concrete footing, making the construction process quicker.

You can opt for a reinforced soil retaining wall (RSW) for a more cost-effective solution. These structures are strong in compression but weak in tension. , the facing of an SRW wall is reinforced with a high-modulus polymer material known as geogrid.

Concerning concrete retaining walls, you have three main options: building blocks, precast panels, and poured-in-place. Each type has its unique set of advantages, and the choice depends on the specific needs of your project.

Blocks are ideal for retaining walls that support sloped landscapes. They are fireproof, rot-proof, and extremely resistant to freeze-thaw cycles. Plus, they are easily molded to create the shape you need for your project and can be topped with plants, gravel, or other landscaping elements to match the surrounding area.

A block retaining wall is also very easy to build. Start by digging a base of crushed stone or other material that is stable enough to support the height of your wall. Then, lay your first course of blocks, ensuring they are perfectly even from left to right and front to back. Use a carpenter’s level to check and adjust as needed. Continue laying courses evenly spaced with staggered joints until you reach the desired wall height. Be sure to backfill each course with crushed stone for added stability.

Poured-in-place retaining walls are more difficult to construct than their precast counterparts. They require proper construction techniques, which can be challenging in tight spaces and harsh environments. Plus, they do not flex with changes in weather or seismic forces, so they are often not the best choice for projects where the wall will be subject to significant pressures.

On the other hand, precast walls are built in a controlled environment using an assembly line process. This makes them more efficient than a poured-in-place structure because they need not be delivered and erected on-site. Plus, they are made from materials that can be found nearly anywhere, so they reduce the need for lengthy transportation routes that could lead to miscommunication and extended timelines.

Precast concrete retaining walls can also be more easily adapted to the design of your project. They are available in a wide range of styles, finishes, and colors and can be customized to reflect the needs of your organization’s location. In addition, they can be made to resemble other types of materials, such as natural stones, bricks, or timbers, for more design flexibility.

Concrete block walls are durable for many projects, from simple terraces to more complex retaining walls. These blocks are available in various sizes, shapes, and colors to suit any landscape design. They are a popular option for DIYers because they interlock to form a solid wall without needing mortar.

Concrete blocks are also great for retaining walls because they can be easily sculpted to create unique designs. Because of their greater mass, these walls are typically taller than a segmental retaining wall. These walls are ideal for several projects because they can add usable space to a yard, fix drainage issues, and make sloped yards more manageable.

To build a concrete block retaining wall:

  1. Begin by excavating the soil in the path of your new wall to allow for a solid footing.
  2. Mark the wall path with a level string line and reference points, such as the corner of your house or an existing landscaping feature on the property. Once the wall’s footing is in place, it is time to lay the first course of blocks.
  3. Use a hammer and chisel to knock off the flange on the back of the block so it sits flat against the ground.
  4. Place the block on the foundation and check it with your carpenter’s level to ensure it is even from left to right and front to back.

Continue laying the block courses until your wall has reached the desired height. When you reach the top of your wall, lay the cap blocks on top. These should be slightly angled so that water runs off the retaining wall instead of collecting on it.

If you need a concrete retaining wall that is very decorative, consider using blocks with an ashlar face. These blocks have a rough surface that mimics stone and can be used to add texture and interest to your retaining wall. While you can build a retaining wall from these blocks without mortar, using a pro for any project over 4 feet tall is recommended. This is because a large retaining wall requires a strong footing and rebar for support, and most pros would rather pour that type of wall.